> ## Documentation Index
> Fetch the complete documentation index at: https://docs.duvo.ai/llms.txt
> Use this file to discover all available pages before exploring further.
# Reviewing Drafts Before Sending
> Build a Duvo agent that drafts outbound messages and waits for your approval before sending them.
**Time to complete:** 15 minutes
**Difficulty:** Beginner
**Prerequisites:** Email or Slack connection
**You'll build:** An agent that drafts outbound messages and waits for your approval before sending them
### Why Automate This?
**The Problem**: Sending the wrong message to a customer or stakeholder is costly — once it's out, you cannot take it back. Teams either review every draft manually (slow) or skip the review entirely and accept the risk (dangerous).
**The Solution**: A Duvo agent that drafts each message and pauses for your approval before sending. You see exactly what will go out, approve or revise it, and the agent handles delivery — all without switching between tools.
**Expected Results**:
* Every outbound message reviewed before it is sent
* Approval decisions reachable from Slack or Requests — no need to open the message editor
* Full audit trail of what was approved, denied, and revised
### What You'll Build
By the end of this tutorial, you'll have an agent that:
1. Reads a list of customer cases or emails that need a response
2. Drafts a personalized reply for each one
3. Pauses and shows you the draft — recipient, subject, and full body
4. Sends the message only after you approve it
5. If you deny a draft, asks you what to change and regenerates before re-requesting approval
### Before You Start
Make sure you have these ready:
**Email connection** — Connect Gmail or Outlook. [Add a connection](/user-guide/connections/how-to-add-connection)
**A source for your messages** — This could be a Gmail inbox, a support queue, a spreadsheet of contacts, or a Slack channel. Connect whichever system holds the inputs.
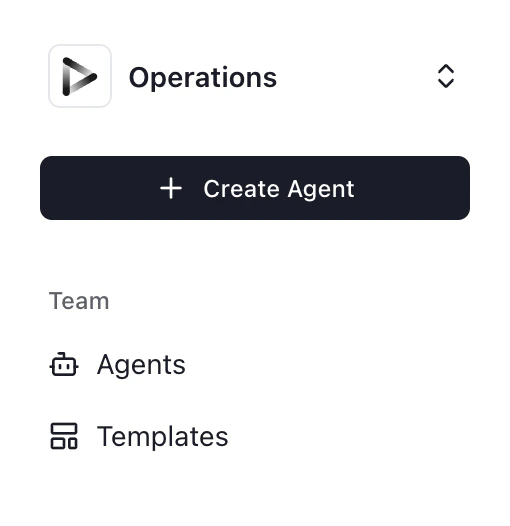
1. Click **"+ Create Agent"** from your dashboard.
2. Select **"Use Agent Builder"**.
 Paste this prompt into the Agent Builder and adjust it to match your source system:
```
Check my Gmail inbox for emails labeled "needs-reply" that have not yet been answered.
For each email:
1. Read the full message and any prior thread context.
2. Draft a professional reply that addresses the customer's question directly.
Keep the tone friendly and concise.
3. Before sending, request approval with:
- Title: "Send reply to [sender name] — [email subject]"
- Description: include the full draft body so I can review it
4. If I approve, send the reply and remove the "needs-reply" label.
5. If I deny, ask me what to change. Revise the draft and request approval again.
```
Click **"Generate"** to create the agent AOP.
Duvo will generate a structured AOP. Check that:
* The source system is correctly identified (Gmail, in this case)
* The approval title format includes enough detail to decide without opening a separate window
* The revision loop is present — the agent should ask what to change when a draft is denied, not just stop
Edit the AOP directly if anything needs adjusting.
Click **"Connections"** and confirm:
1. **Gmail** (or your email provider) — Connect the account you want to send from.
2. **Human-in-the-Loop** — Already available automatically. No setup needed.
Run the agent on a single test email before using it in production:
1. Click **"Start Work"**.
2. Watch the session log as the agent drafts the reply.
3. When the agent reaches the approval gate, a request will appear in your [Requests](/user-guide/assignment-features/requests).
Paste this prompt into the Agent Builder and adjust it to match your source system:
```
Check my Gmail inbox for emails labeled "needs-reply" that have not yet been answered.
For each email:
1. Read the full message and any prior thread context.
2. Draft a professional reply that addresses the customer's question directly.
Keep the tone friendly and concise.
3. Before sending, request approval with:
- Title: "Send reply to [sender name] — [email subject]"
- Description: include the full draft body so I can review it
4. If I approve, send the reply and remove the "needs-reply" label.
5. If I deny, ask me what to change. Revise the draft and request approval again.
```
Click **"Generate"** to create the agent AOP.
Duvo will generate a structured AOP. Check that:
* The source system is correctly identified (Gmail, in this case)
* The approval title format includes enough detail to decide without opening a separate window
* The revision loop is present — the agent should ask what to change when a draft is denied, not just stop
Edit the AOP directly if anything needs adjusting.
Click **"Connections"** and confirm:
1. **Gmail** (or your email provider) — Connect the account you want to send from.
2. **Human-in-the-Loop** — Already available automatically. No setup needed.
Run the agent on a single test email before using it in production:
1. Click **"Start Work"**.
2. Watch the session log as the agent drafts the reply.
3. When the agent reaches the approval gate, a request will appear in your [Requests](/user-guide/assignment-features/requests).
 **Try each path:**
* **Approve the draft** — Verify the email is sent and the label is removed.
* **Deny the draft** — Verify the agent asks you what to change, revises the draft, and requests approval again.
If you have Slack notifications enabled, you can approve or deny drafts without opening Duvo:
1. Go to **Settings > Notifications** and connect your Slack account.
2. Run the agent again.
3. When the approval request is created, the Duvo bot sends you a direct message in Slack with the full draft.
4. Tap **Approve** or **Deny** directly in the Slack message.
5. The agent receives your response and continues — sending the email if approved, or asking for revision if denied.
The Slack message updates to show the outcome after you respond, giving you a record of each decision.
Once testing is successful, set the agent to run automatically:
1. Go to **Agent Settings > Schedule**.
2. Choose how often to check for new emails — every hour, or on a custom schedule.
3. Save the schedule.
New drafts will appear in Requests (or via Slack) as they are generated, ready for your review.
### Expected Results
When your agent runs successfully, you should see:
**In your Requests:**
* One pending approval for each draft, with the full message body visible in the detail panel
* Requests resolve automatically once you approve or deny
**In your email sent folder:**
* Only messages you explicitly approved
* Nothing sent that you did not review
**In Duvo:**
* A complete session log showing each draft, your decision, and the final action taken
### Troubleshooting
* **Check the AOP instruction** — Make sure the description field in the approval request explicitly includes the draft body. Edit the AOP and add: "Include the complete email body in the approval description."
* **Check character limits** — Very long drafts may be trimmed. Break long messages into shorter ones or include a summary in the description.
* **Check the fallback instruction** — The AOP must tell the agent what to do when denied. Add: "If approval is denied, ask the user what to change, revise the draft, and request approval again."
* **Check notification settings** — Go to **Settings > Notifications** and verify Slack is connected and notifications are enabled.
* **Check the Duvo bot** — Make sure the Duvo app is authorized in your Slack workspace.
* **Check the AOP** — The phrase "only send after I approve" (or equivalent) must appear before the send step. Without it, the agent may send immediately after drafting.
### Take It Further
Once your basic approval workflow is running, consider these enhancements:
```
If the email is marked as urgent or the subject contains "URGENT", set the approval title to
"[URGENT] Send reply to [sender] — [subject]" so I can prioritize it in my inbox.
```
```
If the email is a standard acknowledgment with no specific questions (e.g., "Got it, thanks"),
send the reply without requesting approval. Only request approval for substantive messages.
```
```
In the approval description, briefly note why you drafted the reply this way and flag
any part you are uncertain about.
```
The same pattern works for Slack messages, social media comments, or any other outbound communication. Replace the Gmail instructions with the appropriate connection and source.
### Related Resources
Full guide to approval gates and how to write them into your AOP
Where all pending approvals appear
A tutorial for drafting and sending personalized responses at scale
A tutorial showing threshold-based approval gates in a finance workflow
**Try each path:**
* **Approve the draft** — Verify the email is sent and the label is removed.
* **Deny the draft** — Verify the agent asks you what to change, revises the draft, and requests approval again.
If you have Slack notifications enabled, you can approve or deny drafts without opening Duvo:
1. Go to **Settings > Notifications** and connect your Slack account.
2. Run the agent again.
3. When the approval request is created, the Duvo bot sends you a direct message in Slack with the full draft.
4. Tap **Approve** or **Deny** directly in the Slack message.
5. The agent receives your response and continues — sending the email if approved, or asking for revision if denied.
The Slack message updates to show the outcome after you respond, giving you a record of each decision.
Once testing is successful, set the agent to run automatically:
1. Go to **Agent Settings > Schedule**.
2. Choose how often to check for new emails — every hour, or on a custom schedule.
3. Save the schedule.
New drafts will appear in Requests (or via Slack) as they are generated, ready for your review.
### Expected Results
When your agent runs successfully, you should see:
**In your Requests:**
* One pending approval for each draft, with the full message body visible in the detail panel
* Requests resolve automatically once you approve or deny
**In your email sent folder:**
* Only messages you explicitly approved
* Nothing sent that you did not review
**In Duvo:**
* A complete session log showing each draft, your decision, and the final action taken
### Troubleshooting
* **Check the AOP instruction** — Make sure the description field in the approval request explicitly includes the draft body. Edit the AOP and add: "Include the complete email body in the approval description."
* **Check character limits** — Very long drafts may be trimmed. Break long messages into shorter ones or include a summary in the description.
* **Check the fallback instruction** — The AOP must tell the agent what to do when denied. Add: "If approval is denied, ask the user what to change, revise the draft, and request approval again."
* **Check notification settings** — Go to **Settings > Notifications** and verify Slack is connected and notifications are enabled.
* **Check the Duvo bot** — Make sure the Duvo app is authorized in your Slack workspace.
* **Check the AOP** — The phrase "only send after I approve" (or equivalent) must appear before the send step. Without it, the agent may send immediately after drafting.
### Take It Further
Once your basic approval workflow is running, consider these enhancements:
```
If the email is marked as urgent or the subject contains "URGENT", set the approval title to
"[URGENT] Send reply to [sender] — [subject]" so I can prioritize it in my inbox.
```
```
If the email is a standard acknowledgment with no specific questions (e.g., "Got it, thanks"),
send the reply without requesting approval. Only request approval for substantive messages.
```
```
In the approval description, briefly note why you drafted the reply this way and flag
any part you are uncertain about.
```
The same pattern works for Slack messages, social media comments, or any other outbound communication. Replace the Gmail instructions with the appropriate connection and source.
### Related Resources
Full guide to approval gates and how to write them into your AOP
Where all pending approvals appear
A tutorial for drafting and sending personalized responses at scale
A tutorial showing threshold-based approval gates in a finance workflow