> ## Documentation Index
> Fetch the complete documentation index at: https://docs.duvo.ai/llms.txt
> Use this file to discover all available pages before exploring further.
# Email Order Intake
> Build an agent that reads order emails, extracts structured data, writes records, and flags anomalies for review.
**Time to complete:** 30 minutes
**Difficulty:** Intermediate
**Prerequisites:** Gmail or Outlook connection, access to your order management system
**You'll build:** An agent that reads incoming order emails, extracts structured data, writes records, and flags anomalies for review
***
## Why Automate This?
**The Problem**: Orders land in a shared inbox — `orders@company.com` — and someone has to open each one, read the body and any attachments, type the data into your order management system, and check for errors. This takes hours every day. Mistakes happen. Orders get missed when volume spikes. Late or duplicate entries delay fulfillment and frustrate customers.
**The Solution**: A Duvo agent that monitors your shared inbox, reads each order email and its attachments, extracts structured fields, validates them, and writes a clean order record into your system. When something is ambiguous or looks wrong — a missing SKU, a customer that doesn't exist, a quantity outside normal range — the agent flags it for a human to review rather than silently creating a bad record.
**Expected Results**:
* Eliminate manual rekeying for routine orders
* Catch anomalies before they reach fulfillment
* Reduce order entry time from minutes per order to seconds
* Complete audit trail of every order received and processed
***
## What You'll Build
By the end of this playbook, you'll have an agent that:
1. Watches your orders inbox for new emails matching your order pattern
2. Reads the email body, PDF attachments, and spreadsheet attachments to extract order fields
3. Looks up whether the customer and SKUs are known in your system
4. Checks quantities against configured bounds
5. Detects duplicate orders for the same reference number
6. Writes valid orders directly into your order management system
7. Pauses for human review on any order with missing, ambiguous, or out-of-range fields
8. Sends the sender a confirmation or a clarification request once the order is resolved
**Connections used**:
* Gmail or Outlook — read the shared inbox
* Email Attachments Reader — extract data from PDF, Excel, and image attachments
* Intelligent Document Reader — parse unstructured PDF order forms
* Your order management system — write records (Salesforce, NetSuite, SAP, Google Sheets, or your ERP)
* Human-in-the-Loop — pause for review on anomalies
***
## Before You Start
Make sure you have these ready:
**Shared inbox access** — A Gmail or Outlook account for `orders@company.com` (or equivalent). [Connect Gmail](/user-guide/connections/available-connections/gmail) or [Connect Outlook](/user-guide/connections/available-connections/microsoft-outlook).
**Order system login** — Credentials with read and write access to your order management system. [Store logins securely](/user-guide/resources/my-logins).
**Sample order emails** — A few real (anonymized) order emails with attachments. You'll use these for testing in Step 9.
**Field list** — Know which fields your order system expects: customer ID or name, line items (SKU, quantity, unit price), PO number, requested delivery date, and any custom fields.
**Valid customer and SKU lists** — Either accessible in your order system via API, or exportable as a CSV you can upload to Files. Used for validation in Step 6.
If your order system has no API, the agent can enter records through the UI using [Computer Use](/user-guide/connections/computer-use-overview). For web-based ERPs this means browser automation; for desktop clients like SAP GUI it means a remote desktop session. See Step 10 for details.
***
1. Click **"+ Create Agent"** from your dashboard.
2. Select **"Use Agent Builder"**.
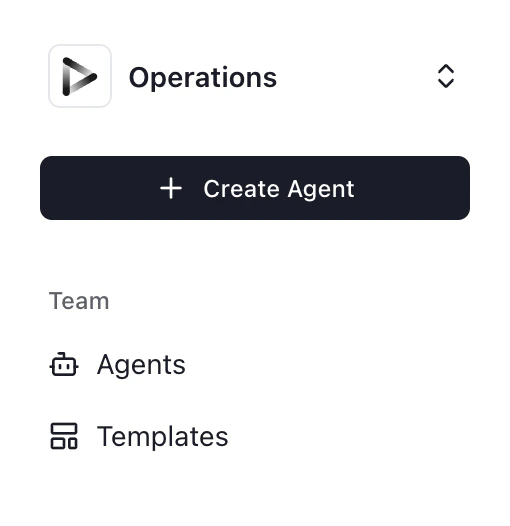 Paste this prompt into the Agent Builder and replace the bracketed placeholders with your specifics:
```
Monitor the shared inbox at [orders@company.com] for new emails that look like purchase orders or order requests.
For each new order email:
1. Read the email body and all attachments (PDFs, spreadsheets, images) to extract:
- Customer name and ID
- PO or order reference number
- Line items: SKU, product name, quantity, unit price
- Requested delivery date
- Special instructions or comments
2. Validate each extracted order:
- Check that the customer exists in [your order system]
- Check that each SKU exists in [your order system]
- Check that each quantity is between 1 and [your max order quantity]
- Check that we have not already received an order with the same reference number
3. If all fields are valid and no anomalies exist:
- Create the order record in [your order system]
- Send the sender a confirmation email: "Your order [reference number] has been received and is being processed."
4. If any field is missing, ambiguous, or fails validation:
- Do not create the order record
- Request human approval. In the title include: "[anomaly type] — [reference number] — [customer name]". In the description include the full extracted data and the specific issue.
- After the human resolves the anomaly (approves with corrections or rejects), either create the corrected record or send the sender a clarification request.
```
Click **"Generate"** to create the agent AOP.
Duvo will generate a structured AOP from your description. Before continuing, confirm:
* Your order system name appears correctly in the AOP.
* The validation rules reflect your actual business rules (customer lookup method, SKU format, quantity bounds).
* The anomaly escalation matches how your team wants to handle exceptions — approve and correct, or bounce back to the sender.
Edit the AOP directly to adjust anything that does not match.
Click **"Connections"** and add:
1. **Gmail or Outlook** — The shared inbox account. If the account is not yours personally, you may need an admin to authorize it.
2. **Email Attachments Reader** — Already available by default; no additional setup required.
3. **Intelligent Document Reader** — Already available by default; handles unstructured PDF forms.
4. **Order system** — Add the login or API credentials for your ERP, CRM, or spreadsheet. See [My Logins](/user-guide/resources/my-logins) for how to store credentials securely.
5. **Human-in-the-Loop** — Already available by default.
Orders often arrive with more than one attachment — for example, a PDF purchase order form and an Excel spreadsheet listing line items. Update your AOP to handle this explicitly:
```
If there are multiple attachments, read all of them. Merge the data:
- Use the PDF for header fields (customer, PO number, delivery date)
- Use the spreadsheet for line items if both are present
- If the same field appears in multiple sources and the values differ, flag as an anomaly
```
For orders that arrive only as image scans (photographed paper forms), the Intelligent Document Reader will extract the text. No additional setup is needed.
Add explicit validation to the AOP to prevent bad records from reaching your order system. Tailor these examples to your business:
```
Validation rules:
- Customer lookup: search [your order system] by customer name or ID. If no exact match, flag as anomaly with the extracted customer name.
- SKU lookup: check each SKU against [your product catalog]. If a SKU is not found, flag the line item.
- Quantity bounds: flag any line item where quantity is less than 1 or greater than [your maximum], as this often indicates a unit-of-measure confusion (e.g., cases vs. units).
- Duplicate detection: before creating a record, search [your order system] for orders with the same reference number received in the last 30 days. If found, flag as potential duplicate with a link to the existing record.
```
When an anomaly occurs, the agent pauses and sends a Human-in-the-Loop approval request. Tell the AOP exactly what information to include and what to do with the response:
```
When requesting human review:
- Title format: "[Anomaly type] — [PO reference] — [Customer name]"
Examples: "Unknown SKU — PO-2024-0847 — Acme Corp"
"Possible duplicate — PO-2024-0831 — Beta Industries"
"Missing customer — PO-2024-0901 — (unknown)"
- Description: include all extracted fields, clearly marking which field failed validation and why.
- Offer two options: (a) Approve with corrections — the reviewer edits the anomalous field and the agent creates the record; (b) Reject — the agent sends the sender a clarification email listing the fields that need correction.
```
See [Human-in-the-Loop](/user-guide/assignment-features/human-in-the-loop) for guidance on writing effective approval gates.
Set the agent to run automatically when new order emails arrive:
1. Go to **Agent Settings** > **Schedule**.
2. Select **Event-driven trigger**.
3. Set the trigger to **"New email"** in your connected inbox.
4. Add a filter so the agent only runs on emails that look like orders — for example, emails with "order" or "PO" in the subject, or emails to a specific inbox alias.
Alternatively, if you prefer batch processing, you can schedule the agent to run every hour or every morning and process all unread order emails at once.
See [Event-Driven Triggers](/user-guide/assignment-features/event-driven-triggers) and [Scheduling Agents](/user-guide/assignment-features/scheduling-assignments) for setup details.
Before going live, run tests against real-world order scenarios:
1. Click **"Start Work"** to run the agent manually.
2. Send test emails to your inbox covering these cases:
| Test case | What to verify |
| ------------------------------ | ------------------------------------------------------------------------ |
| Clean order — email body only | Fields extracted correctly, record created, confirmation sent |
| Clean order — PDF attachment | PDF parsed, all fields extracted, record created |
| Clean order — Excel line items | Spreadsheet read, all line items extracted, record created |
| PDF + spreadsheet together | Both read, data merged correctly |
| Unknown SKU | Anomaly flagged, HITL request sent, record not created |
| Unknown customer | Anomaly flagged, clarification email sent to sender after rejection |
| Duplicate reference number | Duplicate detected, flagged for review |
| Missing delivery date | Anomaly flagged if delivery date is required; record created if optional |
Paste this prompt into the Agent Builder and replace the bracketed placeholders with your specifics:
```
Monitor the shared inbox at [orders@company.com] for new emails that look like purchase orders or order requests.
For each new order email:
1. Read the email body and all attachments (PDFs, spreadsheets, images) to extract:
- Customer name and ID
- PO or order reference number
- Line items: SKU, product name, quantity, unit price
- Requested delivery date
- Special instructions or comments
2. Validate each extracted order:
- Check that the customer exists in [your order system]
- Check that each SKU exists in [your order system]
- Check that each quantity is between 1 and [your max order quantity]
- Check that we have not already received an order with the same reference number
3. If all fields are valid and no anomalies exist:
- Create the order record in [your order system]
- Send the sender a confirmation email: "Your order [reference number] has been received and is being processed."
4. If any field is missing, ambiguous, or fails validation:
- Do not create the order record
- Request human approval. In the title include: "[anomaly type] — [reference number] — [customer name]". In the description include the full extracted data and the specific issue.
- After the human resolves the anomaly (approves with corrections or rejects), either create the corrected record or send the sender a clarification request.
```
Click **"Generate"** to create the agent AOP.
Duvo will generate a structured AOP from your description. Before continuing, confirm:
* Your order system name appears correctly in the AOP.
* The validation rules reflect your actual business rules (customer lookup method, SKU format, quantity bounds).
* The anomaly escalation matches how your team wants to handle exceptions — approve and correct, or bounce back to the sender.
Edit the AOP directly to adjust anything that does not match.
Click **"Connections"** and add:
1. **Gmail or Outlook** — The shared inbox account. If the account is not yours personally, you may need an admin to authorize it.
2. **Email Attachments Reader** — Already available by default; no additional setup required.
3. **Intelligent Document Reader** — Already available by default; handles unstructured PDF forms.
4. **Order system** — Add the login or API credentials for your ERP, CRM, or spreadsheet. See [My Logins](/user-guide/resources/my-logins) for how to store credentials securely.
5. **Human-in-the-Loop** — Already available by default.
Orders often arrive with more than one attachment — for example, a PDF purchase order form and an Excel spreadsheet listing line items. Update your AOP to handle this explicitly:
```
If there are multiple attachments, read all of them. Merge the data:
- Use the PDF for header fields (customer, PO number, delivery date)
- Use the spreadsheet for line items if both are present
- If the same field appears in multiple sources and the values differ, flag as an anomaly
```
For orders that arrive only as image scans (photographed paper forms), the Intelligent Document Reader will extract the text. No additional setup is needed.
Add explicit validation to the AOP to prevent bad records from reaching your order system. Tailor these examples to your business:
```
Validation rules:
- Customer lookup: search [your order system] by customer name or ID. If no exact match, flag as anomaly with the extracted customer name.
- SKU lookup: check each SKU against [your product catalog]. If a SKU is not found, flag the line item.
- Quantity bounds: flag any line item where quantity is less than 1 or greater than [your maximum], as this often indicates a unit-of-measure confusion (e.g., cases vs. units).
- Duplicate detection: before creating a record, search [your order system] for orders with the same reference number received in the last 30 days. If found, flag as potential duplicate with a link to the existing record.
```
When an anomaly occurs, the agent pauses and sends a Human-in-the-Loop approval request. Tell the AOP exactly what information to include and what to do with the response:
```
When requesting human review:
- Title format: "[Anomaly type] — [PO reference] — [Customer name]"
Examples: "Unknown SKU — PO-2024-0847 — Acme Corp"
"Possible duplicate — PO-2024-0831 — Beta Industries"
"Missing customer — PO-2024-0901 — (unknown)"
- Description: include all extracted fields, clearly marking which field failed validation and why.
- Offer two options: (a) Approve with corrections — the reviewer edits the anomalous field and the agent creates the record; (b) Reject — the agent sends the sender a clarification email listing the fields that need correction.
```
See [Human-in-the-Loop](/user-guide/assignment-features/human-in-the-loop) for guidance on writing effective approval gates.
Set the agent to run automatically when new order emails arrive:
1. Go to **Agent Settings** > **Schedule**.
2. Select **Event-driven trigger**.
3. Set the trigger to **"New email"** in your connected inbox.
4. Add a filter so the agent only runs on emails that look like orders — for example, emails with "order" or "PO" in the subject, or emails to a specific inbox alias.
Alternatively, if you prefer batch processing, you can schedule the agent to run every hour or every morning and process all unread order emails at once.
See [Event-Driven Triggers](/user-guide/assignment-features/event-driven-triggers) and [Scheduling Agents](/user-guide/assignment-features/scheduling-assignments) for setup details.
Before going live, run tests against real-world order scenarios:
1. Click **"Start Work"** to run the agent manually.
2. Send test emails to your inbox covering these cases:
| Test case | What to verify |
| ------------------------------ | ------------------------------------------------------------------------ |
| Clean order — email body only | Fields extracted correctly, record created, confirmation sent |
| Clean order — PDF attachment | PDF parsed, all fields extracted, record created |
| Clean order — Excel line items | Spreadsheet read, all line items extracted, record created |
| PDF + spreadsheet together | Both read, data merged correctly |
| Unknown SKU | Anomaly flagged, HITL request sent, record not created |
| Unknown customer | Anomaly flagged, clarification email sent to sender after rejection |
| Duplicate reference number | Duplicate detected, flagged for review |
| Missing delivery date | Anomaly flagged if delivery date is required; record created if optional |
 Review the session log after each test to confirm the agent behaved as expected. Adjust the AOP if any extraction or validation step is not working correctly.
The method the agent uses to create the order record depends on your system:
**API-connected systems (Salesforce, NetSuite, HubSpot, Supabase)**
The agent calls the system's API directly. Confirm write permissions are granted to the credentials you added in Step 4.
**Spreadsheet-based systems (Google Sheets, Excel)**
The agent appends a new row per order. Upload your column headers as a Files file so the agent knows the schema. See [Google Sheets](/user-guide/connections/available-connections/google-sheets) or [Microsoft Excel](/user-guide/connections/available-connections/microsoft-excel).
**Web-only systems (browser-based ERPs)**
The agent navigates the system using [Computer Use](/user-guide/connections/computer-use-overview) — it opens the browser, logs in, fills in the order form, and submits. Add this to your AOP:
```
Open [your order system URL] and log in using the stored login.
Navigate to Create Order and fill in the fields as extracted.
Submit the form and confirm the new order number displayed on screen.
Record the order number in your confirmation email.
```
**Desktop client systems (SAP GUI, legacy Windows ERPs)**
SAP GUI and similar desktop clients are not browser-based. The agent connects via [Windows Remote Desktop](/user-guide/connections/available-connections/windows-remote-desktop) to a machine running the client, then navigates it like a human would. Add this to your AOP:
```
Connect to the remote desktop where [your ERP client] is installed.
Open the client and log in using the stored login.
Navigate to the Create Order screen and fill in the fields as extracted.
Submit and confirm the order number assigned by the system.
Record the order number in your confirmation email.
```
***
## Expected Results
When your agent is running successfully:
**In your inbox**:
* Sender receives a confirmation email for every clean order, referencing the PO number.
* Sender receives a clarification request for rejected anomalies, listing exactly what needs correcting.
**In your order system**:
* A new order record for each valid email, with all extracted fields populated.
* No partial or incorrect records — anomalies are held for human review before being written.
**In your Requests**:
* Pending Human-in-the-Loop requests for each anomalous order, with the extracted data and the specific issue clearly described.
**In Duvo**:
* A complete session log for each run, showing each extraction step, validation outcome, and write action.
***
## Troubleshooting
* **Trigger filter**: If you added a subject-line filter, verify the filter matches the exact wording of your order emails. Try broadening or removing the filter temporarily.
* **Authorization**: Re-authorize the Gmail or Outlook connection if the session has expired.
* **Batch mode**: If you are using a schedule instead of an event trigger, orders will accumulate until the next scheduled run.
* **PDF quality**: Scanned PDFs with low resolution or heavy formatting can reduce extraction accuracy. Ask senders to provide native PDFs where possible.
* **Spreadsheet format**: The agent reads the first sheet by default. Add a note to your AOP if the data is on a different sheet: `"Line items are on the sheet named 'Order Lines'."`
* **Multi-page PDFs**: Long PO forms spanning many pages are supported. If only the first page is extracted, explicitly state in your AOP: `"Read all pages of the PDF attachment."`
* **Customer name matching**: Senders may spell customer names slightly differently. Update your AOP to instruct the agent to match on customer ID rather than name, or to accept close matches (e.g., "Acme Corp." and "ACME Corporation" are the same customer).
* **SKU formatting**: Check that the SKU format from the email (e.g., `SKU-12345`) matches what is stored in your order system (e.g., `12345`). Add a normalization step to the AOP if needed.
* **Quantity bounds**: If your maximum is set too low, adjust it to reflect your realistic order volumes.
* **Reference number format**: Some customers reuse PO numbers across periods. Narrow the deduplication window: `"Check for duplicates received in the last 7 days"` instead of 30.
* **Blanket orders**: Customers with standing orders may legitimately send the same reference number. Add an exception rule: `"Treat emails from [blanket-order-customer@example.com] as always unique regardless of reference number."`
* **Permissions**: Confirm the login has create/write access, not just read.
* **Required fields**: Your order system may reject records missing mandatory fields. Identify which fields are required and add them to the validation step so orders are flagged before a write is attempted.
* **Rate limits**: If processing a large backlog of emails at once, add a short pause between record creation calls: `"Wait 2 seconds between each order creation."`
***
## Take It Further
Once your basic agent is processing clean orders reliably, consider these enhancements:
**Add delivery-date prioritization**
```
Flag any order with a requested delivery date within 3 business days as urgent.
For urgent orders, send a Slack notification to #operations in addition to the standard confirmation.
```
**Route to fulfillment automatically**
```
After creating the order record, look up the warehouse responsible for the customer's region.
Send an internal notification to the regional fulfillment team with the order summary.
```
**Generate a daily intake summary**
```
At 6pm each day, summarize all orders processed that day: total count, total value,
anomaly rate, and any orders still awaiting human review. Send the summary to the operations manager.
```
**Connect to a forecasting agent**
Use processed order data to feed a demand-forecasting agent that alerts the team when inventory is likely to run low. See the Forecasting and Alerting playbook.
**Handle exception follow-ups**
If a clarification email is sent to the sender but no corrected order arrives within 48 hours, have the agent send a follow-up and flag the open item in Requests.
***
## Related
How to design effective approval gates for anomaly review
How to run the agent automatically when a new email arrives
Extracts data from PDFs, spreadsheets, and image attachments
Parses unstructured document formats
For writing to UI-only systems: browser automation for web ERPs, remote desktop for SAP GUI and legacy desktop clients
Store order system credentials securely
Related example for PO approval workflows
Review the session log after each test to confirm the agent behaved as expected. Adjust the AOP if any extraction or validation step is not working correctly.
The method the agent uses to create the order record depends on your system:
**API-connected systems (Salesforce, NetSuite, HubSpot, Supabase)**
The agent calls the system's API directly. Confirm write permissions are granted to the credentials you added in Step 4.
**Spreadsheet-based systems (Google Sheets, Excel)**
The agent appends a new row per order. Upload your column headers as a Files file so the agent knows the schema. See [Google Sheets](/user-guide/connections/available-connections/google-sheets) or [Microsoft Excel](/user-guide/connections/available-connections/microsoft-excel).
**Web-only systems (browser-based ERPs)**
The agent navigates the system using [Computer Use](/user-guide/connections/computer-use-overview) — it opens the browser, logs in, fills in the order form, and submits. Add this to your AOP:
```
Open [your order system URL] and log in using the stored login.
Navigate to Create Order and fill in the fields as extracted.
Submit the form and confirm the new order number displayed on screen.
Record the order number in your confirmation email.
```
**Desktop client systems (SAP GUI, legacy Windows ERPs)**
SAP GUI and similar desktop clients are not browser-based. The agent connects via [Windows Remote Desktop](/user-guide/connections/available-connections/windows-remote-desktop) to a machine running the client, then navigates it like a human would. Add this to your AOP:
```
Connect to the remote desktop where [your ERP client] is installed.
Open the client and log in using the stored login.
Navigate to the Create Order screen and fill in the fields as extracted.
Submit and confirm the order number assigned by the system.
Record the order number in your confirmation email.
```
***
## Expected Results
When your agent is running successfully:
**In your inbox**:
* Sender receives a confirmation email for every clean order, referencing the PO number.
* Sender receives a clarification request for rejected anomalies, listing exactly what needs correcting.
**In your order system**:
* A new order record for each valid email, with all extracted fields populated.
* No partial or incorrect records — anomalies are held for human review before being written.
**In your Requests**:
* Pending Human-in-the-Loop requests for each anomalous order, with the extracted data and the specific issue clearly described.
**In Duvo**:
* A complete session log for each run, showing each extraction step, validation outcome, and write action.
***
## Troubleshooting
* **Trigger filter**: If you added a subject-line filter, verify the filter matches the exact wording of your order emails. Try broadening or removing the filter temporarily.
* **Authorization**: Re-authorize the Gmail or Outlook connection if the session has expired.
* **Batch mode**: If you are using a schedule instead of an event trigger, orders will accumulate until the next scheduled run.
* **PDF quality**: Scanned PDFs with low resolution or heavy formatting can reduce extraction accuracy. Ask senders to provide native PDFs where possible.
* **Spreadsheet format**: The agent reads the first sheet by default. Add a note to your AOP if the data is on a different sheet: `"Line items are on the sheet named 'Order Lines'."`
* **Multi-page PDFs**: Long PO forms spanning many pages are supported. If only the first page is extracted, explicitly state in your AOP: `"Read all pages of the PDF attachment."`
* **Customer name matching**: Senders may spell customer names slightly differently. Update your AOP to instruct the agent to match on customer ID rather than name, or to accept close matches (e.g., "Acme Corp." and "ACME Corporation" are the same customer).
* **SKU formatting**: Check that the SKU format from the email (e.g., `SKU-12345`) matches what is stored in your order system (e.g., `12345`). Add a normalization step to the AOP if needed.
* **Quantity bounds**: If your maximum is set too low, adjust it to reflect your realistic order volumes.
* **Reference number format**: Some customers reuse PO numbers across periods. Narrow the deduplication window: `"Check for duplicates received in the last 7 days"` instead of 30.
* **Blanket orders**: Customers with standing orders may legitimately send the same reference number. Add an exception rule: `"Treat emails from [blanket-order-customer@example.com] as always unique regardless of reference number."`
* **Permissions**: Confirm the login has create/write access, not just read.
* **Required fields**: Your order system may reject records missing mandatory fields. Identify which fields are required and add them to the validation step so orders are flagged before a write is attempted.
* **Rate limits**: If processing a large backlog of emails at once, add a short pause between record creation calls: `"Wait 2 seconds between each order creation."`
***
## Take It Further
Once your basic agent is processing clean orders reliably, consider these enhancements:
**Add delivery-date prioritization**
```
Flag any order with a requested delivery date within 3 business days as urgent.
For urgent orders, send a Slack notification to #operations in addition to the standard confirmation.
```
**Route to fulfillment automatically**
```
After creating the order record, look up the warehouse responsible for the customer's region.
Send an internal notification to the regional fulfillment team with the order summary.
```
**Generate a daily intake summary**
```
At 6pm each day, summarize all orders processed that day: total count, total value,
anomaly rate, and any orders still awaiting human review. Send the summary to the operations manager.
```
**Connect to a forecasting agent**
Use processed order data to feed a demand-forecasting agent that alerts the team when inventory is likely to run low. See the Forecasting and Alerting playbook.
**Handle exception follow-ups**
If a clarification email is sent to the sender but no corrected order arrives within 48 hours, have the agent send a follow-up and flag the open item in Requests.
***
## Related
How to design effective approval gates for anomaly review
How to run the agent automatically when a new email arrives
Extracts data from PDFs, spreadsheets, and image attachments
Parses unstructured document formats
For writing to UI-only systems: browser automation for web ERPs, remote desktop for SAP GUI and legacy desktop clients
Store order system credentials securely
Related example for PO approval workflows